
This assignment can be done either on your personal computer, or in the 618 studio.
Task:
• Mix TWO of the following three songs as best you can using the concepts shown in class. For each song, I have edited the section I want you to mix, which is basically one verse and one chorus. I've put the edited version at the beginning of the Logic project, and I've also put the whole song later in the project, in case you're curious to hear the rest of the song.
• For this assignment, we will aim to make our mixes sound as close as possible to a reference mix, which I've included on the very bottom track of each Logic project. This will force you to listen carefully to the reference and try to reproduce what you're hearing with the tools you have available.
• Mix the song using ONLY automation, EQ, compression, gates, exciter, and reverb.
Downloads:
Download Link: https://we.tl/t-xN0FI87nxu
From easier to hardest:
• Egda Carolyn - "Saudade Do Teu"
Hear a preview
NOTES: you will need an Exciter on the voice here; and consider splitting the voice audio region between two tracks, one for the verse, one for the chorus.
• Glen McPhee - "A Sailor Once More"
Hear a preview
NOTES: the drums are mixed already; notice that change in level in the voice track towards the beginning.
• Jessica Childress - "Slow Down" (Live performance)
Hear a preview
Session Info
NOTES: there's a lot of drum bleed in the vocal mic; mix your drum sound by incorporating this bleed, don't try to EQ the drums out of the vocal.
All of these have been download from the Cambridge "The 'Mixing Secrets' Free Multitrack Download Library".
A few pointers:
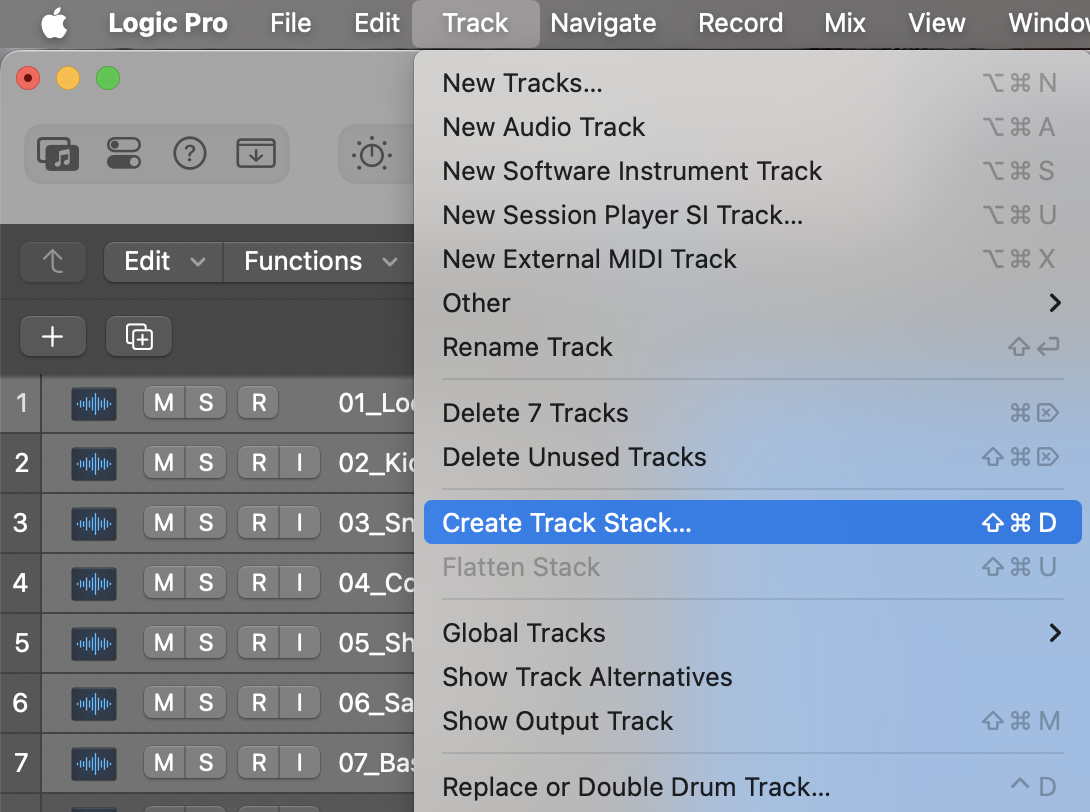
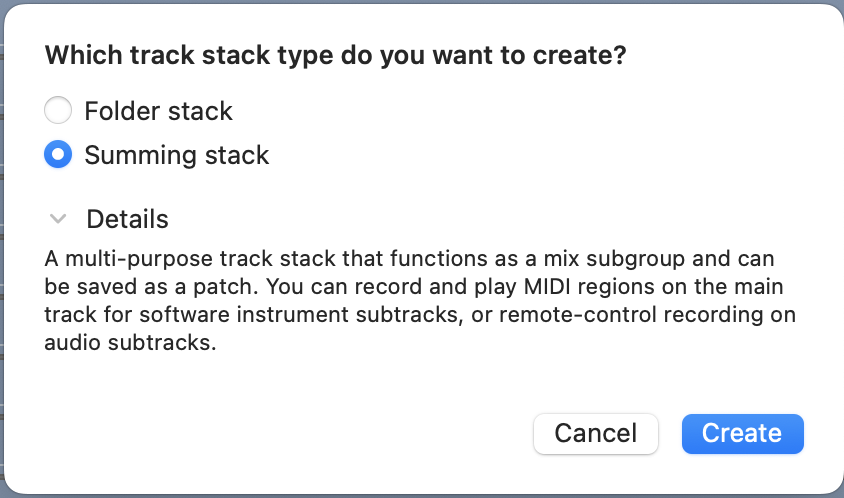
• Organize your tracks into sub-groups by instrument (select tracks, then in the top menu: Tracks->Create Track Stack; choose create "summing stack").
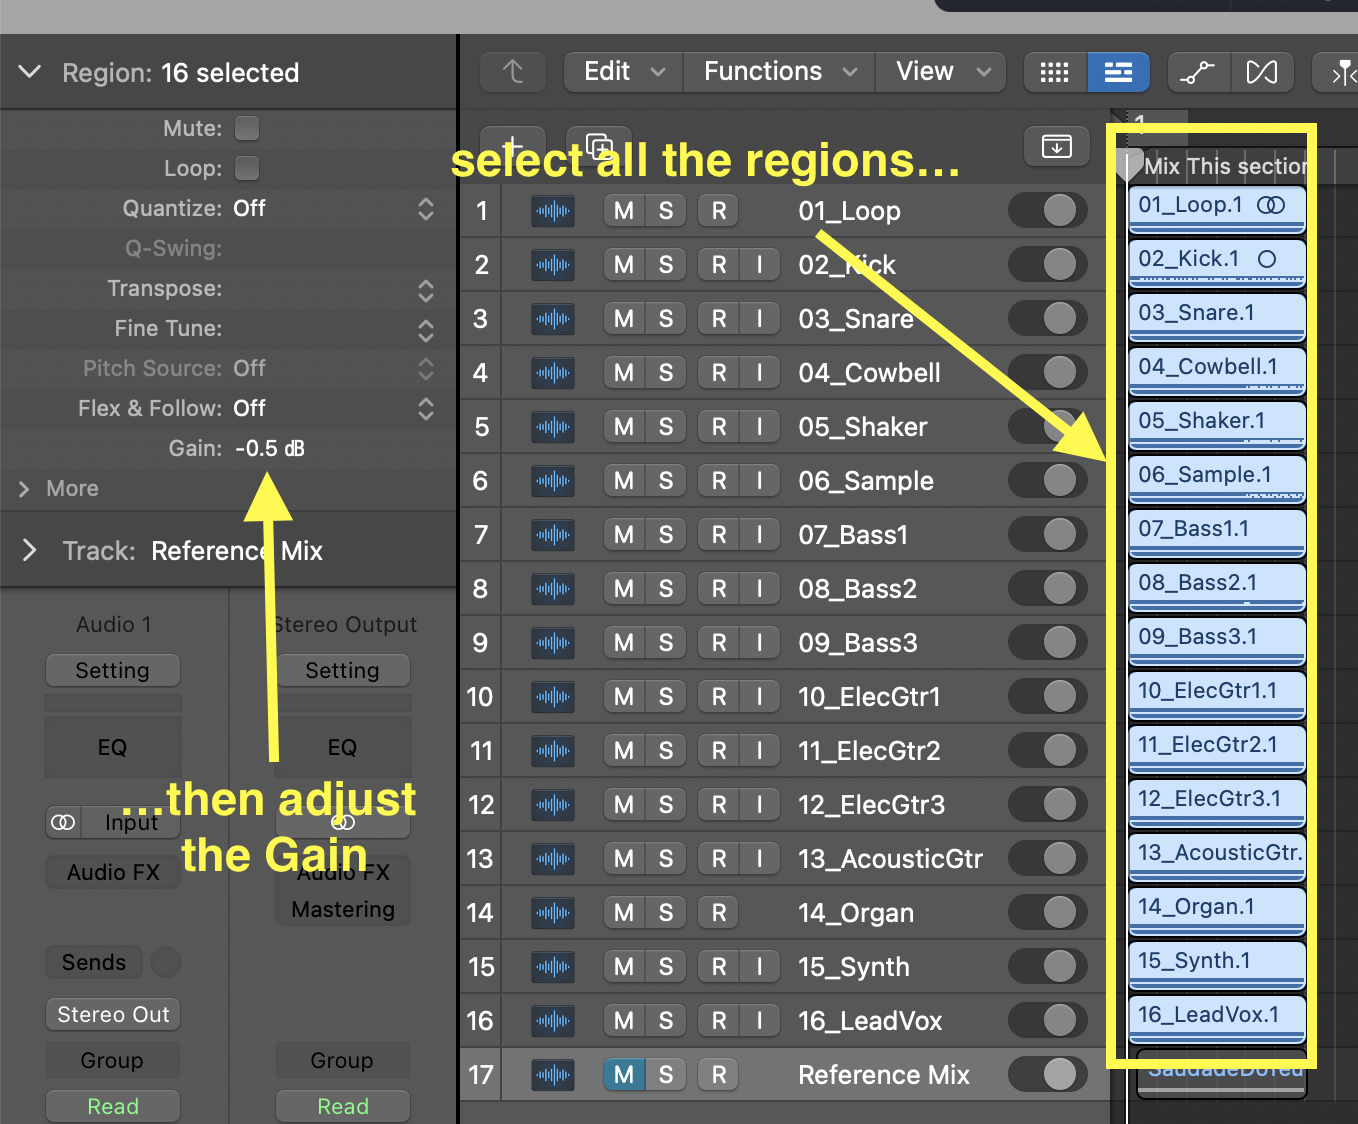
• The tracks might have been recorded very hot; consider bringing down the gain on all of them (this is especially true of the Egda Carolyn).
• VERY IMPORTANT: Listen to all the tracks individually. Add low-cut filter as appropriate: mostly on higher pitched instruments/voices. Remember the low-cut filter should not change the sound of the instrument, only remove low background noises.
• Once you've gone through all the tracks, start your mix with the drums (kick, then snare, then hats, then overheads). REGULARLY compare with the reference track (use the option-click on SOLO command to solo individual tracks), but don't obsess too much if it's not exactly the same. The idea is to get close, then move on to the next instrument, and come back to make more adjustment a little later.
• Once you have a drum sound you're happy with, add bass. Make sure the kick and the bass aren't masking each other, and use EQ to make each audible.
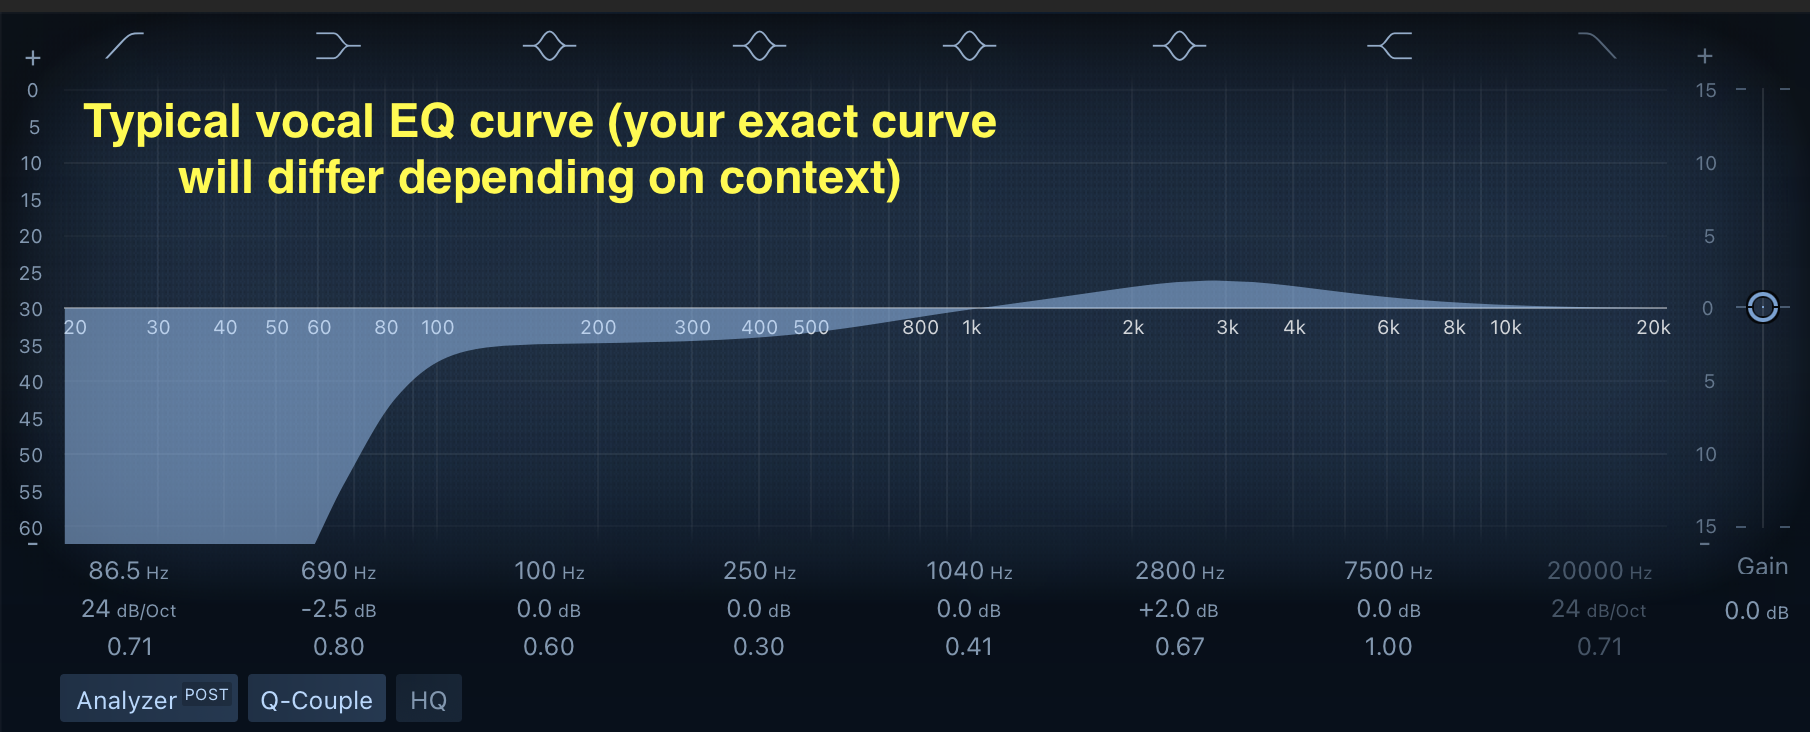
• Once the drum and bass are set, add the main vocal. Use EQ to clean up the vocal: remember the combination I showed: low cut, low shelf attenuation, and 2k-5k band slight boost.
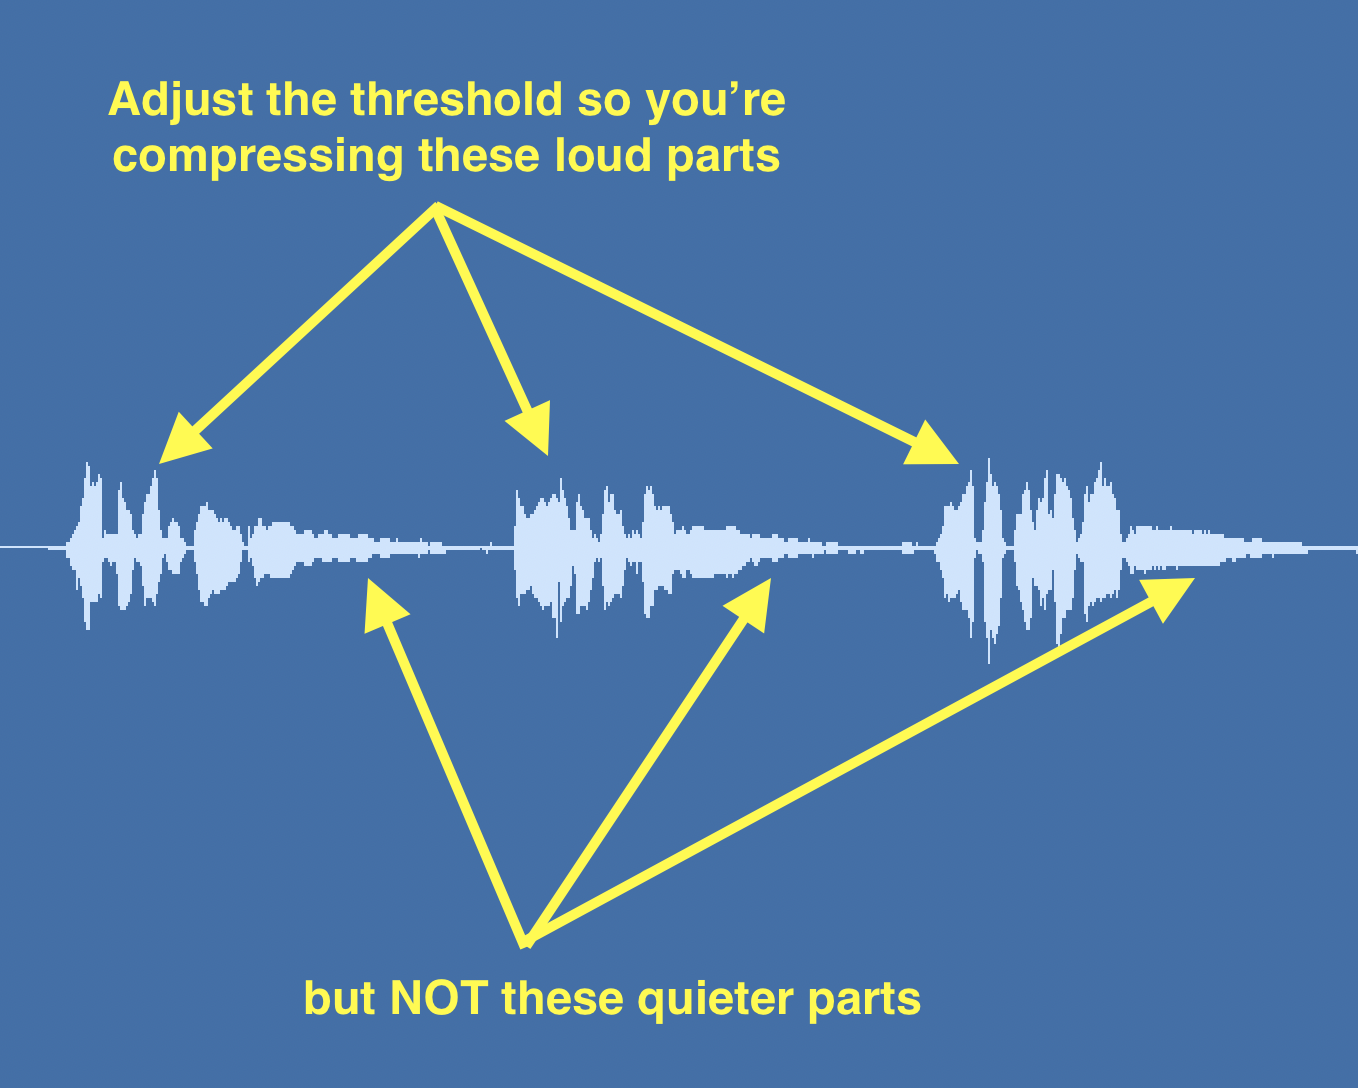
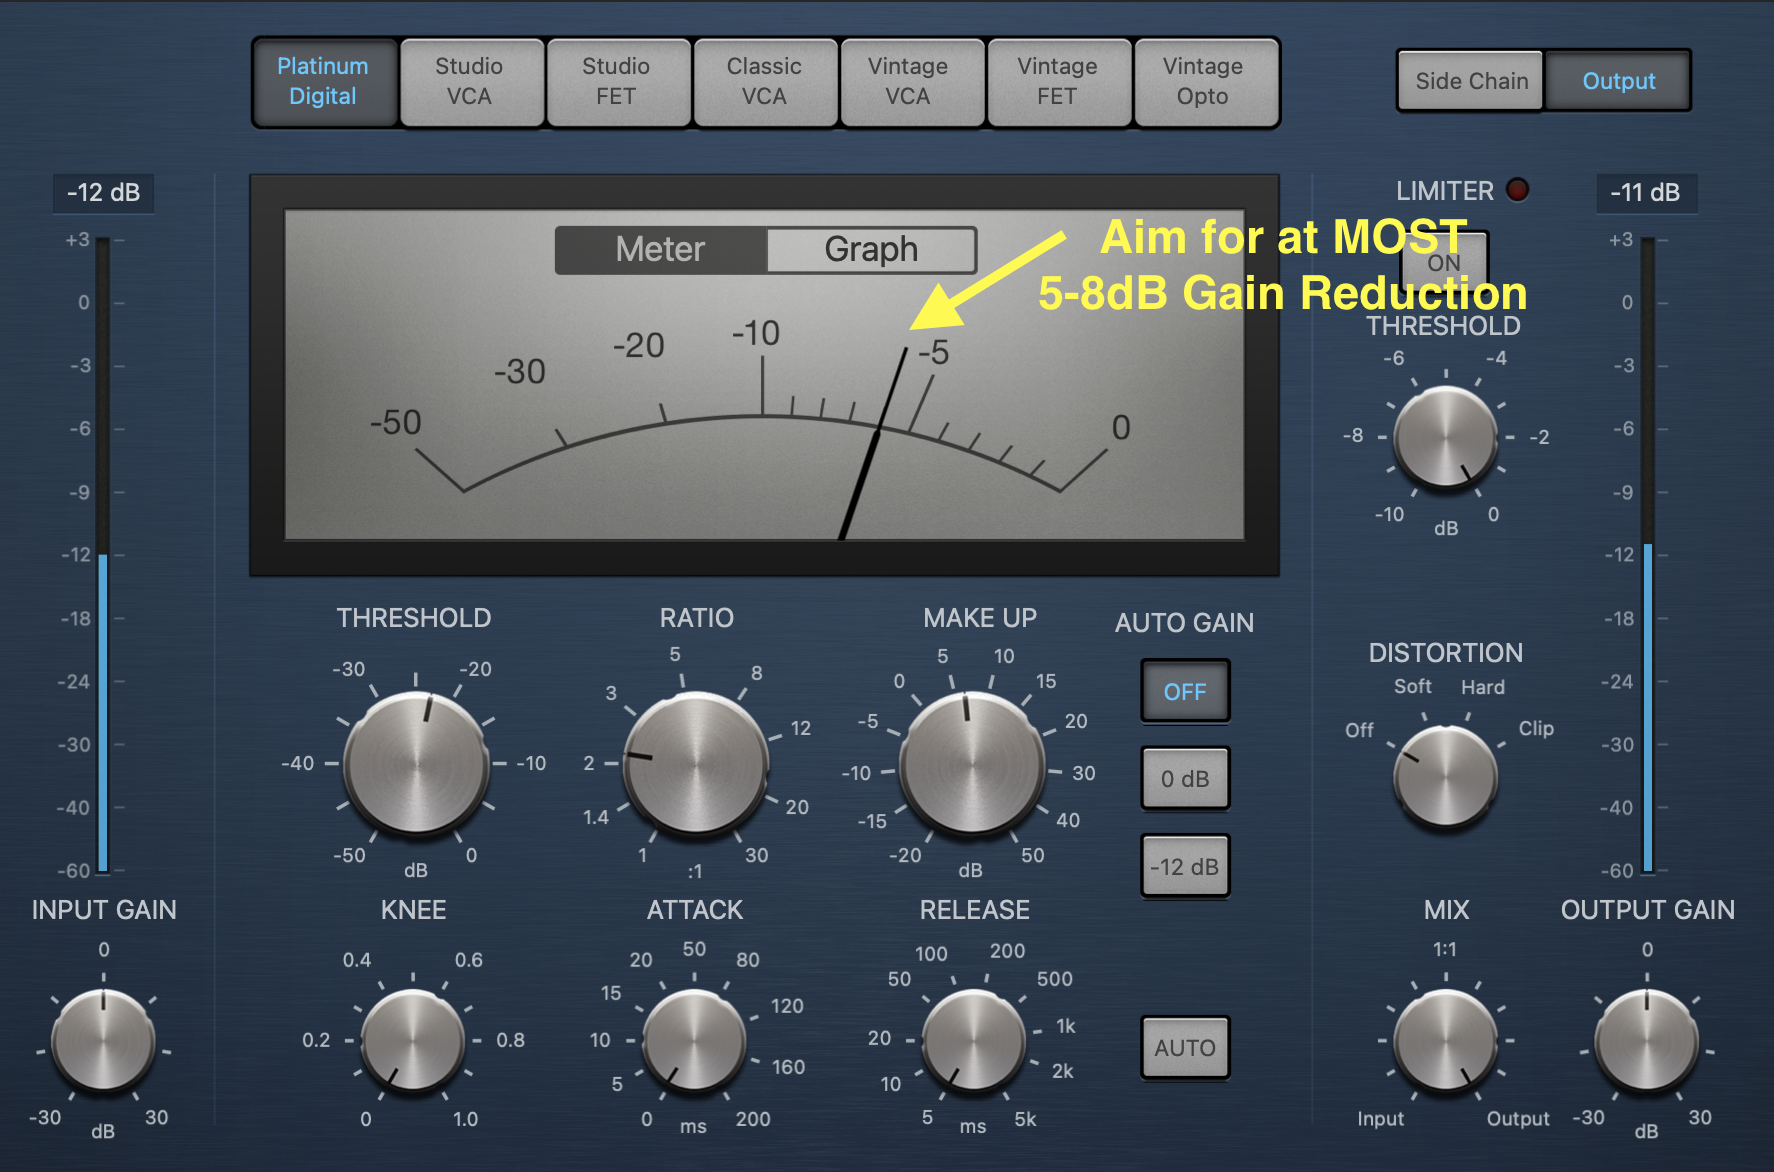
Then add a compressor to make the voice more even. Here, set the threshold so that you're only compressing the loudest parts of the voice. Consider using a very fast attack and release, and enough ratio so that you have at most about 5-8db of gain reduction.
• Add reverb to the voice. Pay special attention to how far the voice sounds on the reference; this will help you figure out how to gauge the dry vs wet (i.e., direct vs reflections) levels.
• Consider editing an instrument (or voice) so that it has a track for different sections (for example, the lead voice could be cut so that there's one track for the verses, and one track for the chorus, each with different EQ, compression, reverb settings).
• With the drums, bass, and voice done, now add the others instruments. Always compare to the reference, and add EQ and/or compression where appropriate.
• Remember: CUT DON'T BOOST!
Be prepared to show your work in class. Please make sure your Logic projects are on the studio computer at the beginning of class. We will be listening to everyone's project.