
Part 1: Recording
By yourself, book time in 618 as soon as possible, and create a short new vocal part (with or without words) to ONE of the two clips below.
1- AlbertKader_Ubiquitous-NewTune.wav
Or
2- Angela_Thomas_Wade-Milk_Cow_Blues_Clip.wav
As necessary, use the Steps to recording into Logic guide to proceed. Please be mindful of feedback: never point a microphone towards the speakers, and/or mute the speakers before you record enable a track.
Aim to make your new part as musical as possible. If you record multiple takes, record over your previous takes (do not delete anything). Logic will automatically create a "Take Folder" which makes it very easy to select the takes you want to keep.
Part 2: Compression
Download the assignment audio here
Listen and Match
• Load the included "David - Compressor Reset" preset to start this assignment. Follow these steps to load the preset:
1) Load the compressor plug-in
2) At the top of the plug-in window, click on the pull-down menu (where it says "Factory Default"), and select "Load…", then choose the "David - Compressor Reset" from the Compression Audio folder you just downloaded.
• Mute previous tracks, and create a new track; import the "Original.wav" file. Using ONLY a compressor in Logic (use the Platinum Digital mode):
• Make "Original" sound like "Version A", and bounce-in-place your track as "A-yourname"
• Make "Original", sound like "Version B", and bounce-in-place your track as B-yourname"
DO NOT import Version A and Version B into Logic. Listen to those files using some other software (you can just hit space-bar in a Finder window),
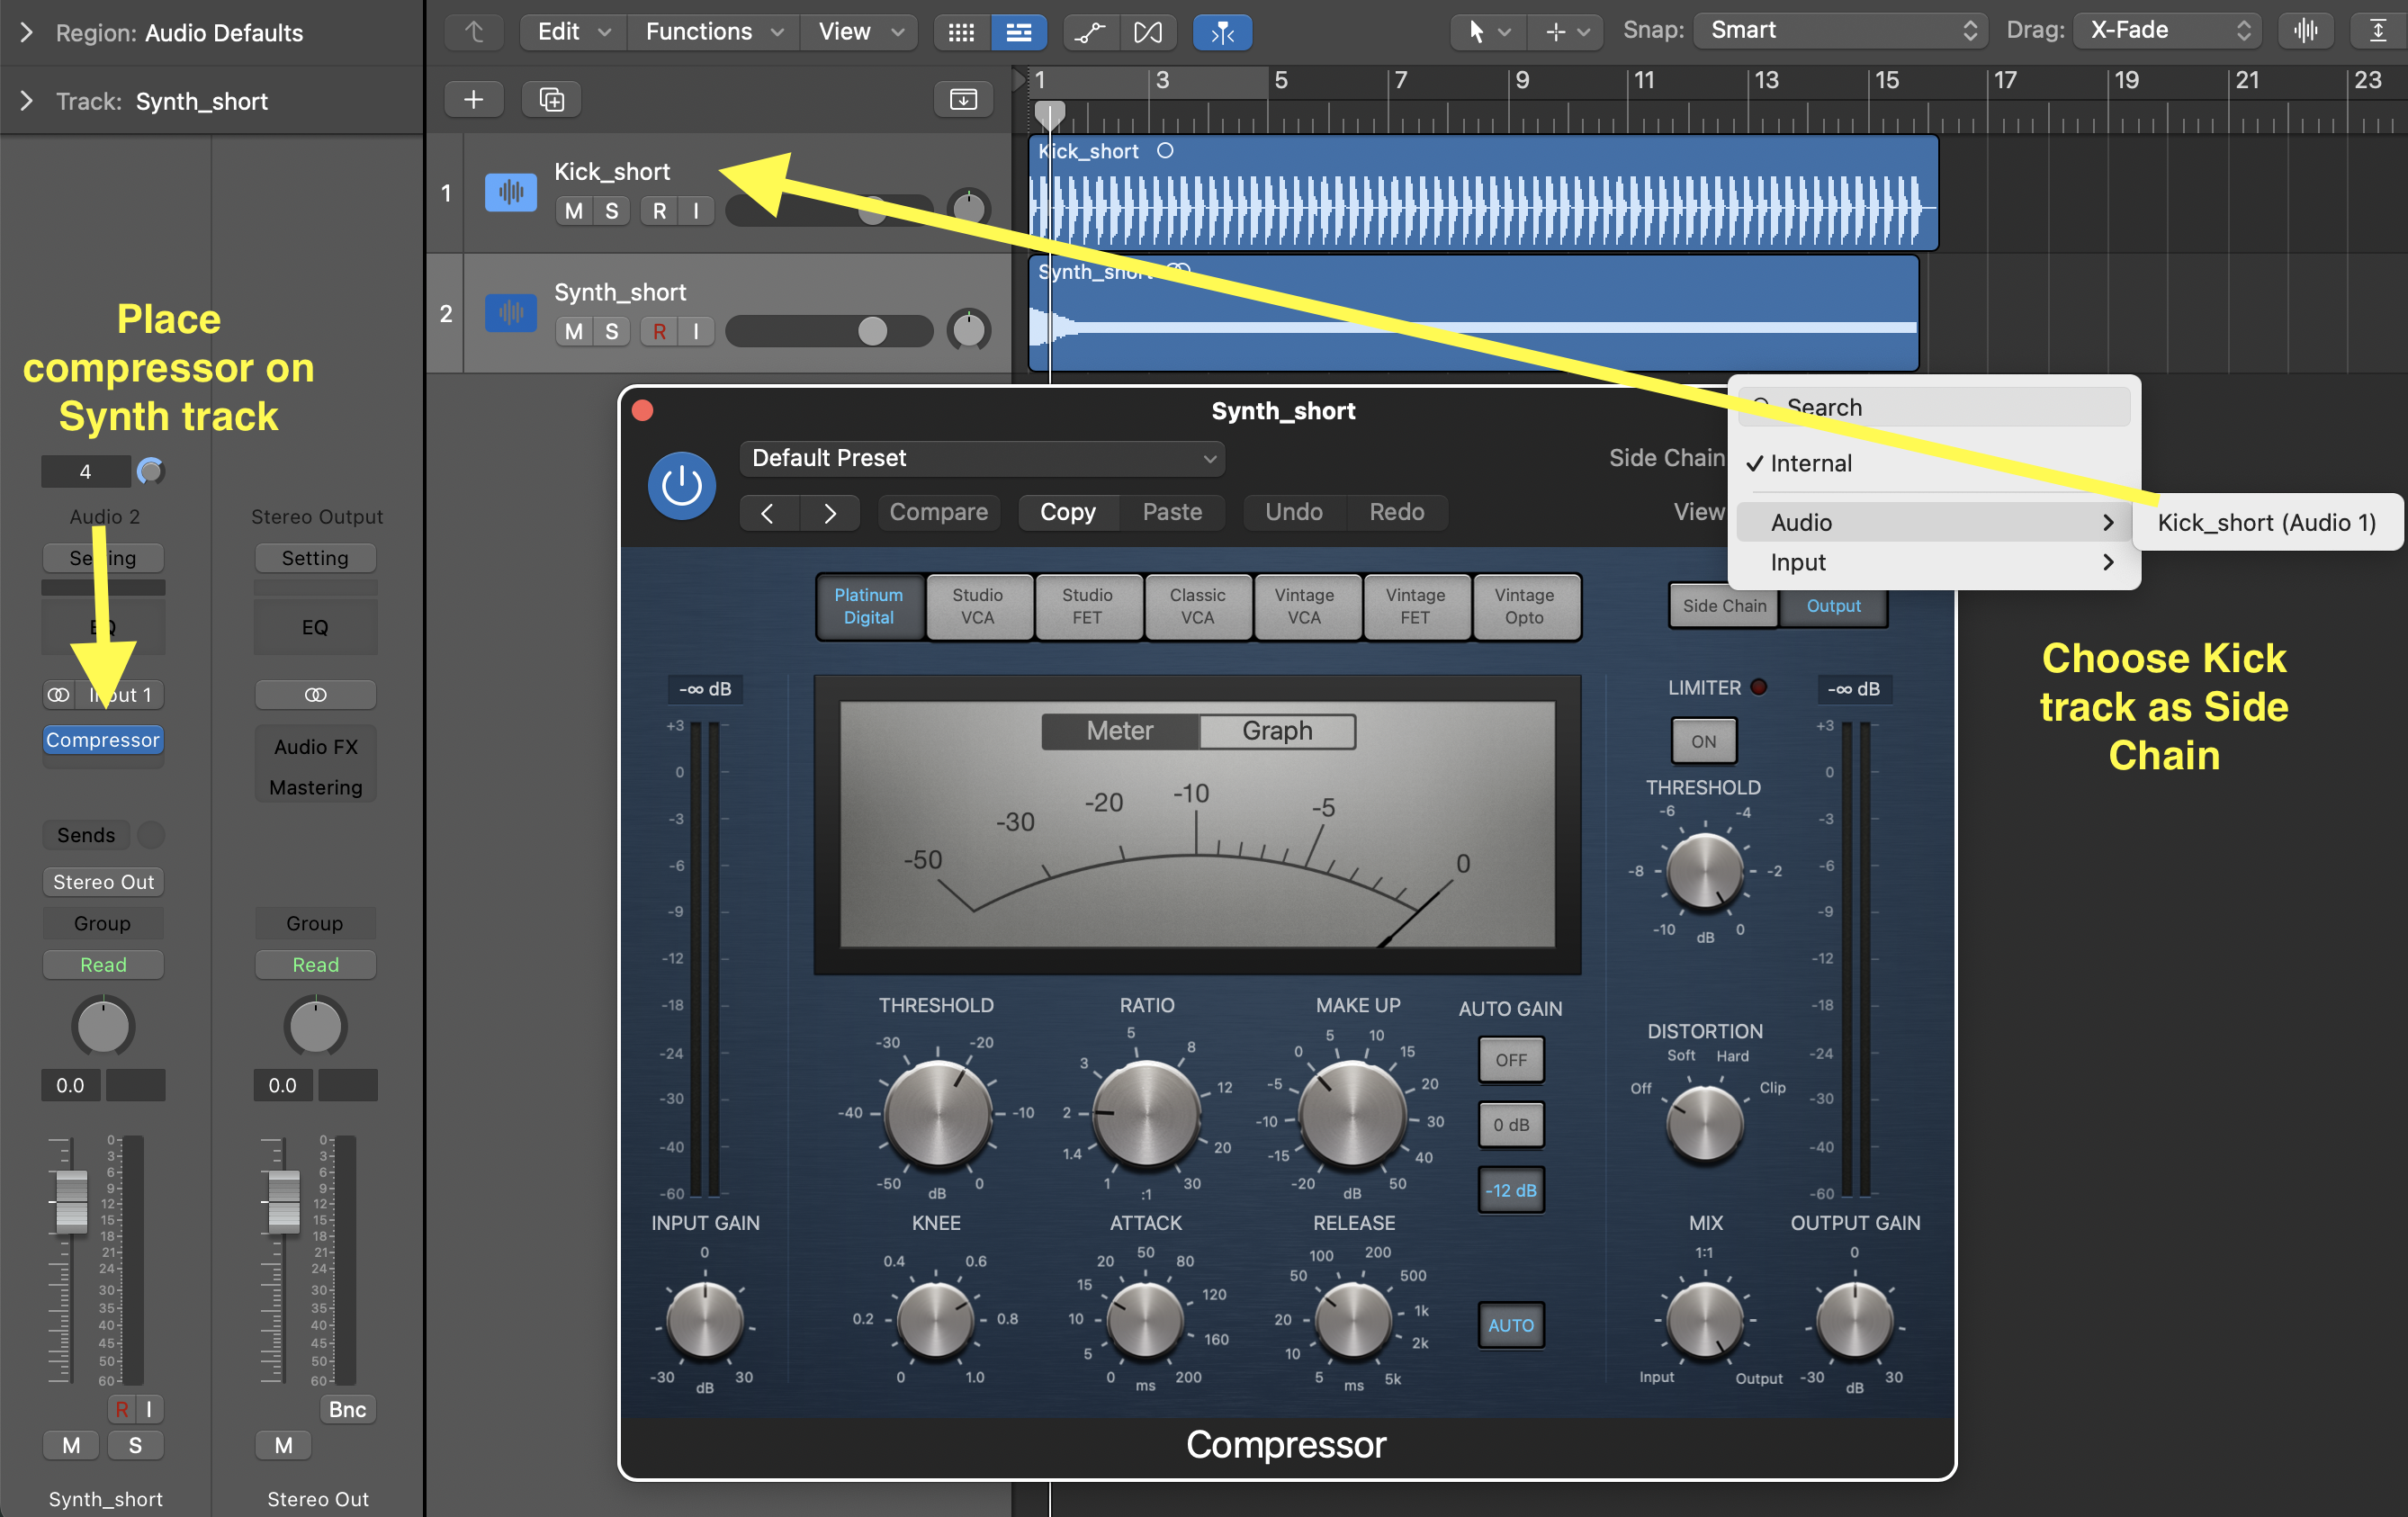
Side Chain
• Mute the previous tracks, and create two new tracks. Import the files "Synth_short.wav" and "Kick_short.wav". Configure a sidechain with a compressor on the "Synth" track using the Kick as the trigger, with the goal of creating a "pumping" effect.
Experiment with different attack and release times to see how it affects "pumping". Also, try the various emulation modes (the grey buttons at the top of the compressor: Studio VCA, Studio FET, etc.).
Compress your Recording
• Apply compression to the recording you made for Part 1, so that the recording has an even dynamic range and is easily heard along with the track. You should use the processing chain discussed in class:
• Clean up EQ (what I called trash EQ)
• Compressor
• Shaping EQ
• Beautification (delay, reverb, etc, as you see fit)
Use the compressor with a purpose and only target the parts that need to be compressed. Follow these steps:
1) Find the parts of the recording that you DON'T want compressed; these are usually the QUIETEST. Note what is the level of these parts using the input meter on the left of the compressor.
2) Set the threshold just a few dB above the level you just noted. Also, set the Ration to 2:1.
3) Play the recording, and make sure the compressor is not compressing the quiet parts. If it is, then raise the Threshold just a bit.
4) Raise the Ratio so that the compressor is compressing by 6-7dB on the LOUDEST parts.
5) Raise the Make-up by the same amount that the compressor is compressing on the loudest parts (which should be 6-7dB if you did the previous step correctly).